I got question how I painted my BT-7 and SU-12 vehicles for my Flames of war EW fast tankovy in my previous post (link). I tough it could be good to make a guide how I painted them when I add my next element for the tankovy.
I am pleased with the speed and the final result of the tanks and it always feels good too. To get this do you need a Airbrush, I do not think there are any other way to get the smooth blends and fast result otherwise.
So here is my walk through:
Step 1: Assemble and add a grey primer with airbrush. Airbrush first layer off MIG-931 Russian dark base to get shadow effects.
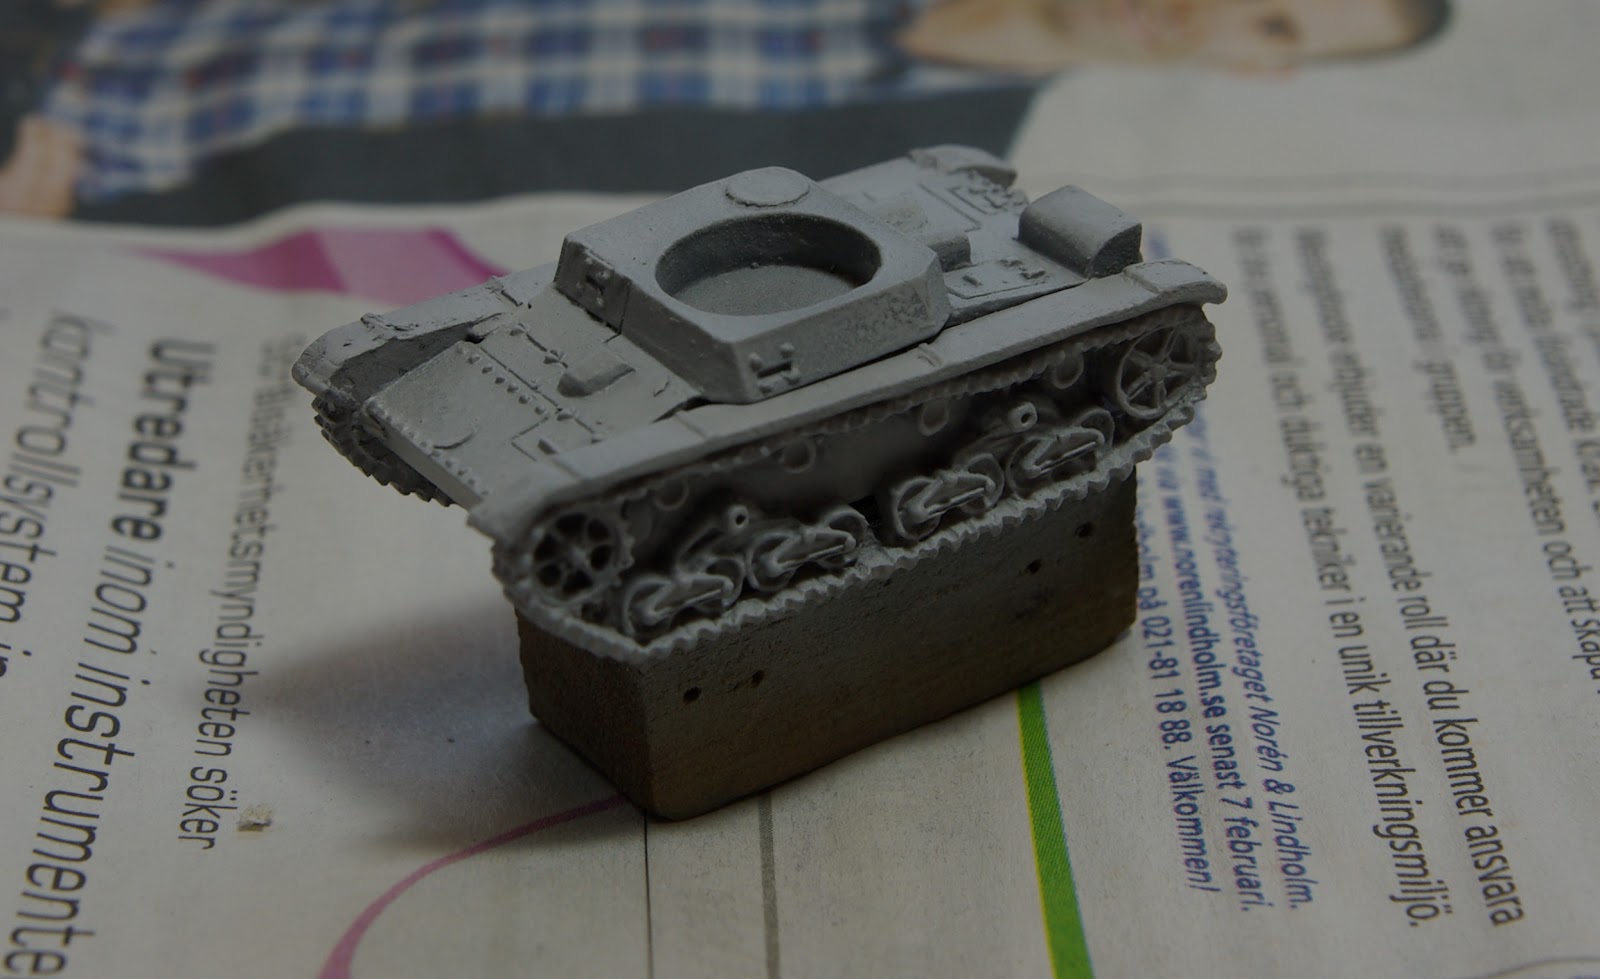


Step 2: Airbrush MIG-932 Russian base as base cover over the hole model from above. Leave the Russian dark base on the under up areas and in the darker edge off the colour modulation.


Step 3: First highlight colour is MIG-933 Russian light base of the colour modulation. this should cover around 20-40% off the panel that you do the colour modulation on. Use cardboard as cover to get the sharp edges when needed.


Step 4: Second and last highlight MIG-933 Russian highlight. This is the final stage of the colour modulation. Take care when apply the last highlight, it needs to be light and only in 10-20% of the panel to create the strong effect needed later.


Step 5: Seal model with satin varnish with airbrush to get a thin and even coating.
Step 6/7: To bring the colour modulation together and dull down the model a bit do I use a AK-077 Nato filter from AK interactive. I apply this thinly over the complete model after 20-30 minutes do I go back and clean some areas where it´s to strong and some thinner and a brush.
Then I add AK-075 Nato wash I use a thin brush to add pools around all the crevices and rivets etc. where the dirt would be collected. Wait for 30 minutes and go back and clean with a thinner and a brush. You can create some streak effects this way also. You want to keep the wash in the crevices and clean the flat bigger surfaces.


Step 8: Time to hand paint. I start painting the tracks with a 50/50 mix between Vallejo 70995 (German grey) and Vallejo 70836 (London grey) and all other metal surface such as shovel blades and exhausts. Then I paint the track tiers with a 50/50 mix of Vallejo 70995 (German grey) and Vallejo 70950 (Black).
Next is to add the scratches and wear effect. I use Vallejo 70822 (German cam. black brown) with a sponge. Remove most of the paint and the dab it on the edges and surface where there would be chaffing and wear.


Step 9/10: Add washes on the tracks and on the muffler and exhaust. I use a50/50 mix between AK-046 (Light Rust) and AK-045 (Dark brown wash). Then I make the rust streaks on the turret and tank body. Start to add AK-013 in the top of the area where you want the rust streak to be then wait for 20-30min. Then take a flat our round brush with light amount of thinner added. Drag the brush in the direction of the rust streak you want. Normally where the gravity would pull the water. I think this step gives most to the final result.


Step 11: Pigments: Add pigments to the tracks and area where dust would come. I make the pigment colour I want by mixing different pigments then I add thinner to make a paint thickness of it. I apply the mix on the tracks and area around the tracks. Then I wait over night to let it dry. I come back next day and remove the pigments with a brush where it´s to heavy. Fix the pigments with MIG pigments fixer, you could use any enamel pigment fixer on the market for this. When the fixer is dry do I add black pigment on the exhaust area and the end of the cannon. This time I also added rust pigment on the muffler. Fix with pigment fixer.


No comments:
Post a Comment